Motorcycle Suspension Setup - Day 3
The damping, both rebound and compression are best adjusted after riding your bike and feeling how it handles to you. You cannot use your mate’s settings. The reason why there is so much debate and controversy regarding suspension set up is because it is a personal experience and depends on how and where you ride your motorcycle.
Some people, media and websites will charge or tell you what they think is best for you whilst amongst top racers it is a closely guarded secret. You have to find your own settings that you are comfortable with and take notes as you experiment with different settings.
tyre profiles

Setting the right amount of damping depends on the type of bike, how you ride the bike of bike, and shape and pressure of tyres you use. Also it depends on your riding style and how much suspension travel you want at any particular moment. This article will try to explain what to look out for and how to tweak it.
If you can adjust the damping but cannot adjust the rebound and compression separately, then you will have to find a compromise between the two for your bike. If you run out of adjustment, then depending on if the damping, either rebound or compression, is too slow or too fast then you may need to change the damping oil to thinner or thicker suspension oil relatively.
Note that your suspension will handle differently under different conditions i.e. high or low speed, wet or dry conditions, therefore experiment with setting up your bike under the conditions you would like to use them.
I do not know the exact terminology used in your manufacturers owners manual but note that
Soft damping = little damping = decreased damping
Hard damping = excessive damping = increased damping
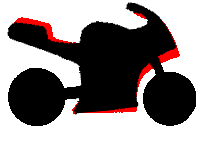 Nose Up
 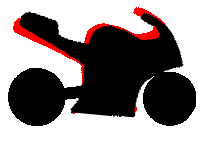 Nose down
You need your front compression under braking and when riding over uneven humps. You want your front suspension to compress slowly and controlled when you break. As your bike “nose dives” under braking, it transfers more weight over the front wheel. This helps slow the bike quicker.
If the front suspension compresses too quickly (too soft) you risk the suspension bottoming out and then your bike will feel vague and since it nose dives too quickly the back wheel may loose contact with the road and move sideways. On the other hand when compression damping is too high the suspension can't react quickly enough to compress over bumps and will skip and chatter. You will have an uncomfortable ride and your braking is compromised, especially in the wet.
 Another important aspect of front compression is when you brake just before a turn. As you brake before the corner, the bike will naturally “nose dive”, this will shorten the wheel base and alter the geometry of the bike making the bike turn quicker into the corner. It is important that your bike compresses predictably and safely in a corner/turn.
 SOFT: If your compression is too soft, your bike will nose dive too quickly, then as you turn into the corner, the bike will collapse into it and you end up having to compensate.
HARD: On the other hand if you have too much front compression damping, do not get enough nose dive and the bike will be reluctant to turn and may drift wide on entry to the corner.
Go for a ride on your bike and try braking and turning into corners at different speeds. This will cause a bit of nose dive so try different setting. If your bike bottoms out, increase the front preload. See preload notes . Keep notes.
Front Rebound
Front rebound damping is to control the rate the bike “sits up” after the front suspension has been compressed i.e. from nose down position. If it is too soft, the front end will pop up too quickly after any situation causing the front suspension to compress e.g. braking or cornering causing the bike to "see-saw". This may result in lack of traction If rebound damping is too high you may have lack of “feedback” and in extreme cases where the suspension can't react quickly enough to extend again it will pump down until it bottoms out which is simply dangerous,
If it takes more than a second then you need softer rebound but if it takes less than a second or it rebounds past its original position then you should make your rebound harder. This method may work but really it is too simplistic for real world riding.
SOFT: If it rebounds too quickly in the corner your bike will sit up very quickly creating a longer wheel base. The front wheel “shooting” out also causes the bike to drift wide or a feeling of the front end “washing out” If this happens, increase (harden) your rebound to slow the rate the front wheel rebounds.
HARD: On the other hand if the rebound is too hard, when you let go of the brakes and on to the throttle in a corner, because the wheel is compressed for longer you will have a shorter wheel base for longer. This may cause the bike to feel wooden in the corner and turn too quickly. Soften her up.
To set up your front rebound damping you are going to have to go through a few corners a few times and it is best that you have sorted out the preload and front compression first. Basically you want to be able to
- brake hard either before the turn or up to the apex of the turn, (whichever suits you)
- let go of the brakes
- get on to the throttle without the bike “see-sawing” i.e. sit up or dive
by adjusting only the rebound damping only (remember that we have sorted the compression so don’t mess it up.)
NOTESNo advanced damping control if you cannot adjust the rebound and compression separately but you can adjust the damping, then you will have to go for a compromise. Since most accidents happen in a turn, then I will suggest that you set it up for cornering. Try to get the bike to enter and exit a corner with minimal rocking or seesawing to the front end. These setting should be ok for bumpy tarmac.
Keep a record Keep a note of the settings you are using as well as the make and pressure of your tyres. Different tyres shapes, sizes and pressure can affect your readings and therefore you may want to keep a record of all your setting especially if you are a track addict or racer. Also keep a note of the weather and cooler temperature will thicken the oil in your forks while on a hotter day, your fork oil may thin a bit. You do not want to go through all this again.
Counting Clicks If your bike uses clicks to adjust damping, and you want to adjust your damping settings, do not simply turn it a few clicks till you think you have the right new settings. Fully count the clicks in to ensure you were on the right old settings then count it out to the right new settings. Example you think your front compression is on 5 clicks out and you want to try 7 clicks out. Do not simply turn it 2 clicks out. Count the 5 click in, and then count the 7 clicks out.
Set Up Do not adjust more than one setting at a time unless it is to a previously recorded set up as you will not know which setting cause the most effect. I commute to work and I used to make one small (a click) adjustment a day. Sometimes I would leave it for a week because the conditions where not right to feel the new settings in action. On the track, I would suggest one setting change per session, minimum.
Altering Bike Geometry You can alter your bikes geometry by sliding your front forks up through your front yoke.. i.e. your forks will stick up through the yoke a bit more than standard thereby causing your bike to have a more nose down bias. This makes the bike turn in faster, it doesn't increase the corner speed and you will loose ground clearance (CBR riders take note) I will not recommend moving your front forks more than 5 mm
Sean Onipede - Click here for Motorcycle Suspension Setup Forum
posted by moto-racing at
7:39 AM
![]()

0 Comments:
Post a Comment
Subscribe to Post Comments [Atom]
<< Home